General settings: Difference between revisions
(Marked this version for translation) |
No edit summary |
||
| Line 1: | Line 1: | ||
<languages/> | <languages/> | ||
<translate> | <translate> | ||
= | = Create an integration = | ||
To create an integration, select '''Get JS check''', '''Get meta redirect''', or '''Get meta redirect S2S''' option on the [https://kaminari.click/integration Integration] page. | |||
[[File:Settings 5.png]] | [[File:Settings 5.png]] | ||
<br> | <br> | ||
You will be redirected to the integration creation page. You will need to fill in the required integration name field and select the integration status (choose ''Active'' if you want to launch it immediately or ''Stopped'' if you need more time). | |||
[[File:Settings 4.png]] | [[File:Settings 4.png]] | ||
<br> | <br> | ||
= Sub-tags = | |||
If desired, you can tag incoming traffic with tags. Depending on the type of integration, you will have access to either 7 or 10 sub-tags, each of which will be displayed as a separate column in the statistics. | |||
The ''encode'' button makes the tag safe for URLs. | |||
You can fill in the sub-tag fields here in the form, and they will be stored in the database. If you need to make any adjustments, they will always be at your fingertips. Alternatively, you can leave the fields blank. | |||
<br> | <br> | ||
==== | ==== Examples of tag filling ==== | ||
For example, if your landing page is written in PHP and the parameters for the tags come in the URL, you can extract them directly from there: | |||
[[File:Js check 12.png]] | [[File:Js check 12.png]] | ||
<br> | <br> | ||
Or if you're using a template engine like Mustache or Jinja, the fields may look something like this: | |||
[[File:Js check 5.png]] | [[File:Js check 5.png]] | ||
<br> | <br> | ||
= | = Embed code = | ||
After filling out the form, a generated script or link code will appear at the bottom of the page, which you can copy using the ''Copy'' button and place on your page in the <code><body></code> tag. | |||
'''Under no circumstances should you change the kmnrKey field, which specifies the unique ID of your integration. If it differs from the saved one, clicks will not be recorded in the database.''' | |||
''' | |||
[[File:Js check 13.png]] | [[File:Js check 13.png]] | ||
<br> | <br> | ||
or like this: | |||
[[File:Js check 6.png]] | [[File:Js check 6.png]] | ||
<br> | <br> | ||
= Integration stop = | |||
= | If you want to stop the integration, change its status to ''Stopped''. New statistics will stop being recorded, but you will still be able to edit the settings, view the accumulated statistics, and start the integration again. | ||
[[File:Settings 3.png]] | [[File:Settings 3.png]] | ||
<br> | <br> | ||
= | = Modifying or deleting an integration = | ||
If you want to modify or delete an integration, click on the ''Edit'' or ''Delete'' button in the list. | |||
''' | '''Note that after deletion, the integration and its statistics will become unavailable.''' | ||
[[File:Settings 2.png]] | [[File:Settings 2.png]] | ||
</translate> | </translate> | ||
Revision as of 01:40, 19 September 2023
Create an integration
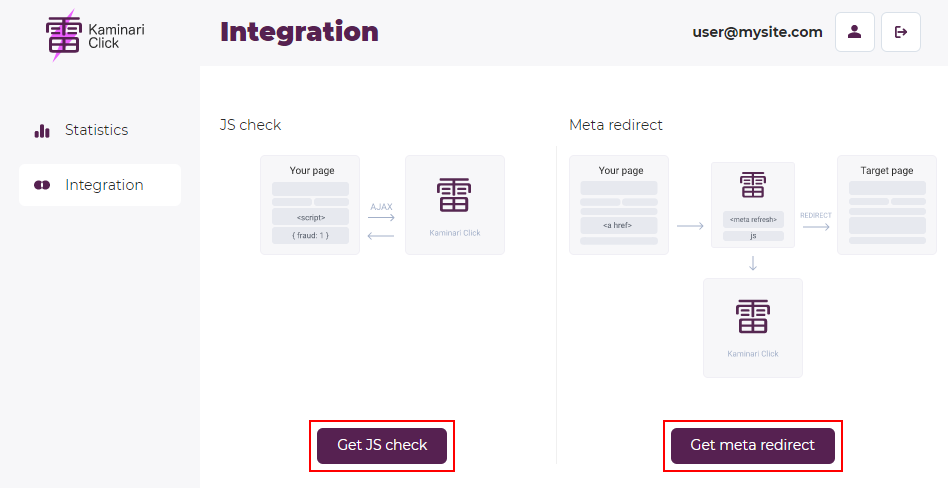
To create an integration, select Get JS check, Get meta redirect, or Get meta redirect S2S option on the Integration page.
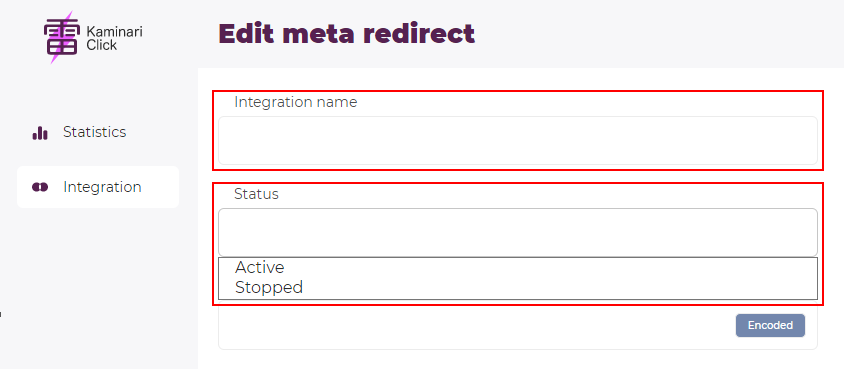
You will be redirected to the integration creation page. You will need to fill in the required integration name field and select the integration status (choose Active if you want to launch it immediately or Stopped if you need more time).
Sub-tags
If desired, you can tag incoming traffic with tags. Depending on the type of integration, you will have access to either 7 or 10 sub-tags, each of which will be displayed as a separate column in the statistics.
The encode button makes the tag safe for URLs.
You can fill in the sub-tag fields here in the form, and they will be stored in the database. If you need to make any adjustments, they will always be at your fingertips. Alternatively, you can leave the fields blank.
Examples of tag filling
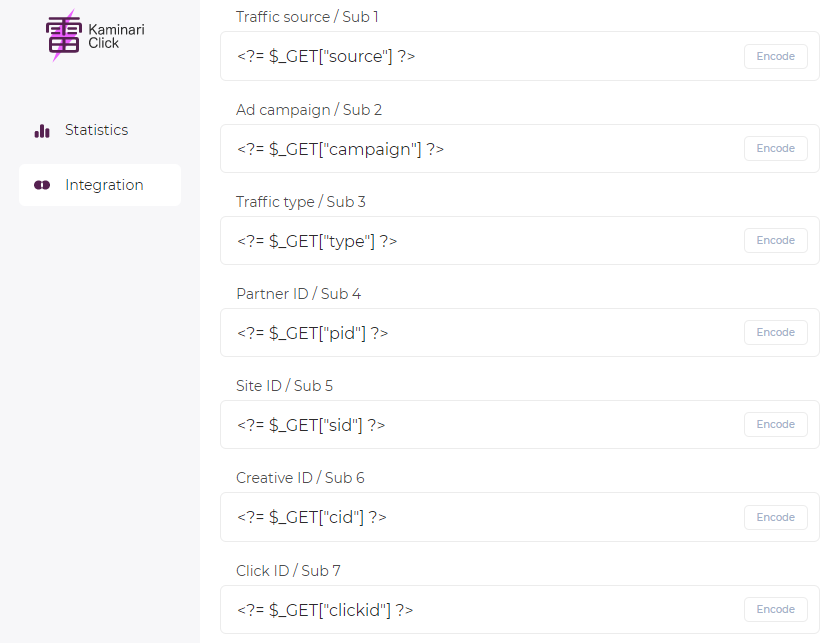
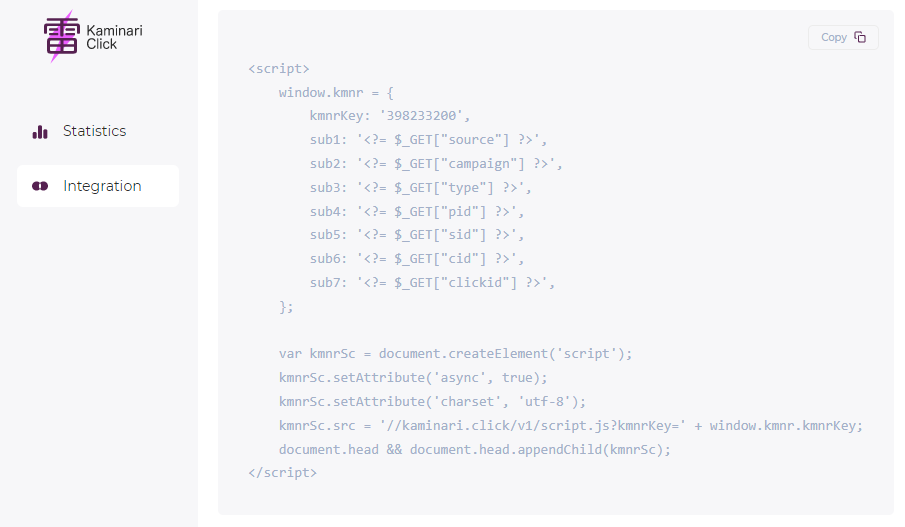
For example, if your landing page is written in PHP and the parameters for the tags come in the URL, you can extract them directly from there:
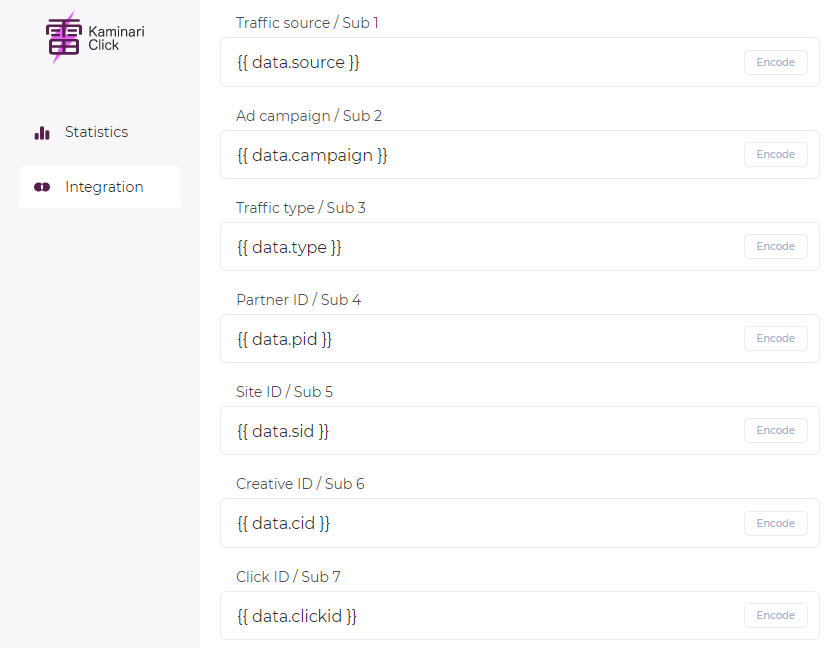
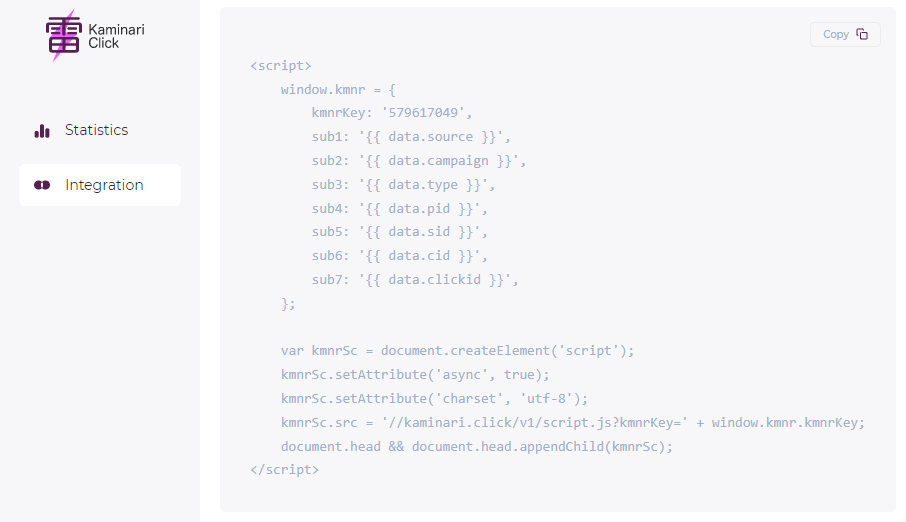
Or if you're using a template engine like Mustache or Jinja, the fields may look something like this:
Embed code
After filling out the form, a generated script or link code will appear at the bottom of the page, which you can copy using the Copy button and place on your page in the <body> tag.
Under no circumstances should you change the kmnrKey field, which specifies the unique ID of your integration. If it differs from the saved one, clicks will not be recorded in the database.
or like this:
Integration stop
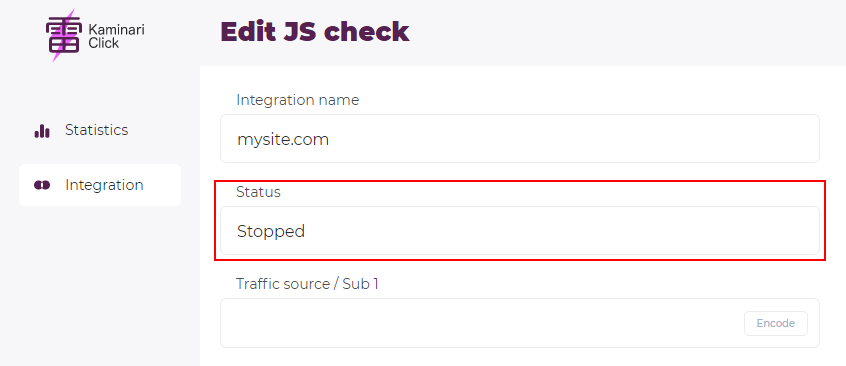
If you want to stop the integration, change its status to Stopped. New statistics will stop being recorded, but you will still be able to edit the settings, view the accumulated statistics, and start the integration again.
Modifying or deleting an integration
If you want to modify or delete an integration, click on the Edit or Delete button in the list. Note that after deletion, the integration and its statistics will become unavailable.
